 Save to Pinterest
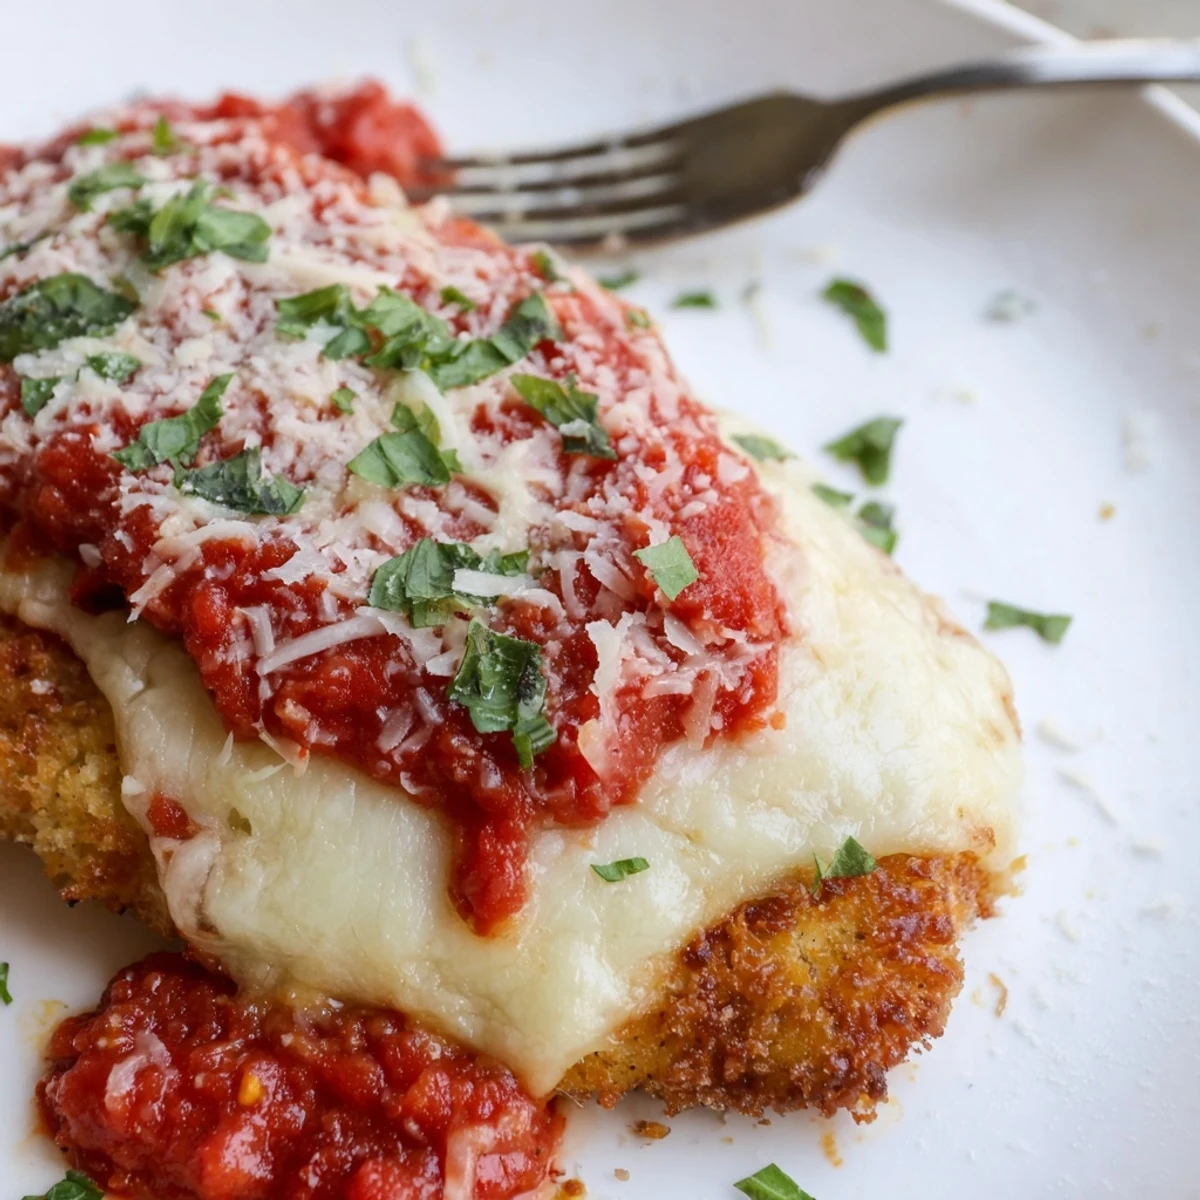
 This beloved Italian-American classic starts with chicken breasts pounded thin, breaded in a seasoned Parmesan-oregano coating, then pan-fried until crispy. The golden cutlets are smothered in homemade marinara spiked with garlic and basil, then blanketed in melted mozzarella and finished under the broiler until bubbly and lightly browned.
The beauty lies in the contrast—crunchy exterior giving way to juicy meat, tangy sauce balancing rich cheese. Serve over spaghetti or alongside garlic bread for the complete experience. Leftovers reheat beautifully, if they last that long.
The steam hitting my glasses as I lifted the baking dish from the oven told me everything was right. My little brother looked up from his phone, drawn in by the smell of bubbling mozzarella and that familiar tomato-basil aroma that fills the house when something good is happening.
Last winter my friend Jess came over after a terrible week at work. She took one bite of this chicken parm, closed her eyes, and told me it was the first time all week she had stopped thinking about everything else. Food has this way of grounding us, you know?
Ingredients
- 4 boneless skinless chicken breasts: Pounding them thin ensures even cooking and that perfect tender texture in every bite
- 1 cup all-purpose flour: The first layer that helps everything stick and creates a light coating
- 2 large eggs and 2 tablespoons milk: Whisked together, this is the glue that holds the breadcrumbs in place
- 1 ½ cups Italian-style breadcrumbs: Get the good ones with herbs already mixed in, or toast plain ones with a little garlic and oregano
- 1 cup grated Parmesan cheese divided: Half goes in the breading for extra flavor, half on top for that golden crust
- 1 teaspoon dried oregano: Classic Italian flavor that blooms when it hits the hot oil
- 1 teaspoon garlic powder: Distributed evenly through every bite instead of concentrated spots
- 1 teaspoon salt and ½ teaspoon black pepper: Keep it simple, let the other ingredients shine
- 4 tablespoons olive oil: Just enough to get a golden fry without making it heavy
- 2 cups marinara sauce: Homemade is lovely but do not stress, a good jarred sauce works perfectly here
- 2 cloves garlic minced: Fresh garlic in the sauce makes all the difference
- 1 tablespoon olive oil: For sautéing the garlic into the sauce
- 1 teaspoon dried basil and ½ teaspoon sugar: The basil deepens the sauce flavor, the sugar cuts any acidity
- 2 cups shredded mozzarella cheese: Low moisture cheese melts better without making everything watery
- ¼ cup chopped fresh basil or parsley: The finishing touch that makes it look like you tried harder than you did
Instructions
- Get your oven ready and pound that chicken:
- Preheat to 400°F and grease a large baking dish. Pound the chicken between plastic wrap until it is an even ½-inch thick. This relaxes the meat and guarantees uniform cooking.
- Set up your three station assembly line:
- Flour in one shallow bowl, whisked eggs and milk in another, then breadcrumbs mixed with half the Parmesan, oregano, garlic powder, salt, and pepper in the third. Keep one hand for dry ingredients, one for wet to avoid the dreaded clumpy fingers situation.
- Dredge, dip, and coat each piece:
- Press each chicken breast into flour, shake off excess, dip through the egg mixture, then really press into the crumbs. The pressure here is what makes the coating stick and create that satisfying crunch.
- Fry until golden and irresistible:
- Heat olive oil in a large skillet over medium-high heat. Cook chicken 2 to 3 minutes per side until golden and crisp. They will finish in the oven, so do not worry about cooking through completely here.
- Build a quick but incredible sauce:
- Heat olive oil in a saucepan, sauté garlic for just 30 seconds until fragrant. Pour in marinara, add basil and sugar if using, then let it simmer 5 minutes. That brief simmer mellows everything into something special.
- Layer it all up for the final bake:
- Spread 1 cup sauce in the baking dish bottom. Arrange chicken on top, spoon remaining sauce over each piece, then cover with mozzarella and remaining Parmesan. This ordering prevents soggy bottoms.
- Bake until bubbly and perfect:
- 18 to 20 minutes at 400°F until cheese is bubbling and chicken reaches 165°F internally. The sauce should be slightly thickened around the edges.
- Add the finishing touch:
- Sprinkle with fresh basil or parsley right before serving. Serve immediately while that cheese is still molten and the crust retains its crunch.
 Save to Pinterest
 This was the first proper dinner my college boyfriend ever made for me. He was so nervous about the breading falling off that he hovered by the oven the entire time, checking every three minutes. We ate it standing up in his tiny kitchen because we were too impatient to set the table, and honestly, it was perfect that way.
Making It Lighter Without Sacrificing Flavor
Skip the frying step entirely and bake the breaded chicken at 425°F for 20 minutes, flipping halfway through. The crust will not be quite as crunchy but you save calories and simplify the whole process. Spray the breaded chicken lightly with olive oil spray before baking to help it crisp up in the oven heat.
Side Dishes That Actually Work
Spaghetti tossed in a little of that same sauce is classic for a reason. A crisp green salad with a bright vinaigrette cuts through all that rich cheese beautifully. Or go for roasted broccoli or asparagus, something green and fresh to balance the heavy comfort of the main dish.
Make Ahead Strategy
You can bread the chicken up to 4 hours ahead, keep it refrigerated on a baking sheet lined with parchment. Fry when ready to proceed with the recipe. The sauce also improves after a day in the fridge, so make it the day before and let those flavors meld together.
- Freeze unbaked breaded cutlets between sheets of parchment for up to 3 months
- Bake from frozen at 400°F for 25 to 30 minutes before adding sauce and cheese
- Already assembled chicken parm freezes well too, just thaw overnight before baking
 Save to Pinterest
 Some dishes are just worth the extra pans and steps, and this is absolutely one of them. That first crispy, cheesy, saucy bite makes all the effort disappear completely.
Recipe Questions & Answers
- → Can I make chicken parmigiana ahead of time?
-
Absolutely. Bread and fry the chicken up to a day in advance, then refrigerate. When ready to serve, top with sauce and cheese, then bake until heated through and melted. The browning station setup makes prep efficient for busy weeknights.
- → What's the best way to achieve crispy breading?
-
The key is the three-step dredging process: flour first for adhesion, then egg wash, finally the breadcrumb-Parmesan mixture. Letting coated chicken rest for 10 minutes before frying helps the coating set. Avoid overcrowding the pan so pieces brown evenly rather than steam.
- → Can I bake instead of fry the chicken?
-
Yes, for a lighter version. Bread as directed, then arrange on a wire rack over a baking sheet. Spray generously with olive oil cooking spray and bake at 425°F for 20-25 minutes, flipping halfway. The texture will be less crispy but still satisfying.
- → What type of breadcrumbs work best?
-
Italian-seasoned breadcrumbs add authentic flavor, but panko yields extra crunch. For the crispiest results, combine half panko with half traditional breadcrumbs. Fresh breadcrumbs made from day-old Italian bread create the most authentic texture.
- → How do I prevent the chicken from drying out?
-
Pounding to even thickness ensures uniform cooking. Don't overcook—the internal temperature should reach 165°F, but remove from heat just before to account for carryover cooking. Frying quickly seals in moisture before the oven phase finishes the job.
- → What sides complement chicken parmigiana?
-
Classic pairings include spaghetti with marinara, garlic knots, or crusty bread to soak up extra sauce. A crisp Caesar or arugula salad with bright vinaigrette cuts through the richness. Roasted broccoli or sautéed spinach add color and balance.
