 Save to Pinterest
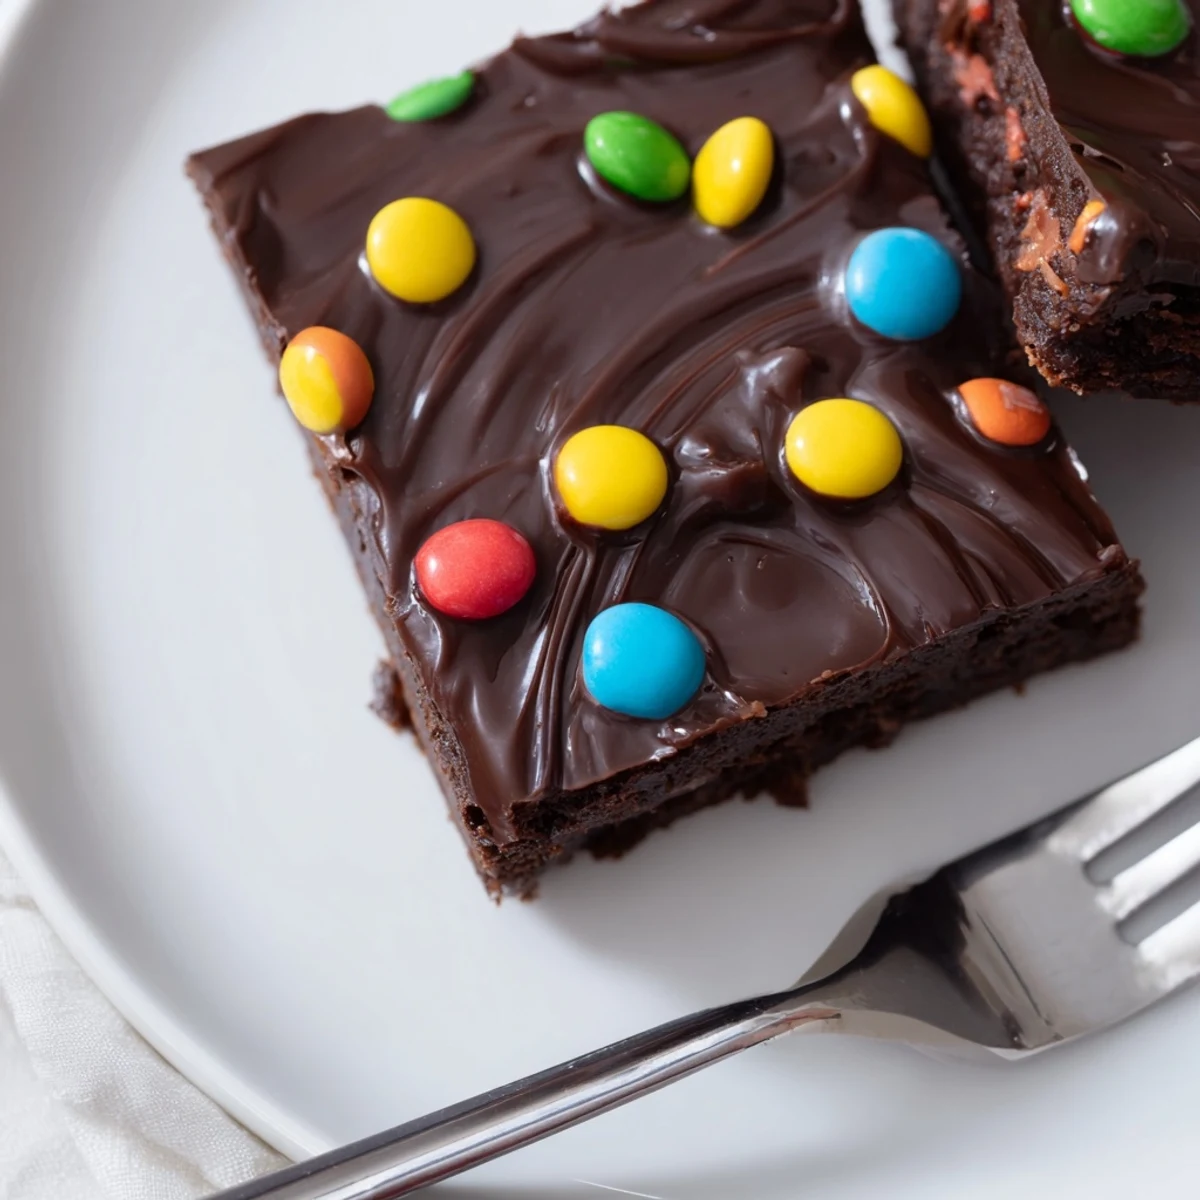
 These gourmet Cosmic brownie bars pair a fudgy, cocoa-rich base baked in an 8x8 pan with a silky chocolate ganache and a scatter of candy-coated chips. Whisk melted butter with sugars, fold in eggs and dry ingredients without overmixing, bake until edges set, cool completely, then pour cooled ganache and chill until set. Slice into 12 bars; add espresso powder to intensify chocolate.
The unmistakable crinkle of a Little Debbie wrapper still sends me straight back to third grade lunch tables, trading fruit snacks for cosmic brownies like they were currency. Those dense, fudgy squares with their glossy ganache and rainbow candy tops were the undisputed prize of any lunchroom swap. Years later, I found myself standing in my kitchen at midnight, craving that exact texture but wanting something that tasted like it came from a bakery, not a plastic wrapper. That impulse turned into these Gourmet Cosmic Brownie Bars, and honestly, they changed my baking reputation forever.
I brought a tray of these to a potluck thinking they would be a cute conversation starter, and they vanished so fast I barely got one myself. My friend Marcus, who never comments on dessert, texted me that night asking if I could make them for his birthday. Something about that familiar rainbow topping on a genuinely rich, grown up brownie just hits people right in the heart.
Ingredients
- Unsalted butter (170 g, melted): The melted butter is what gives these bars their dense, fudgy crumb rather than a cakey texture.
- Granulated sugar (200 g) and light brown sugar (100 g, packed): Using both sugars gives you a crackly top from the white sugar and chewy depth from the brown.
- 2 large eggs: Room temperature eggs blend more smoothly into the batter, preventing streaks.
- Pure vanilla extract (1 tsp): A small amount goes a long way in enhancing the chocolate without competing with it.
- Unsweetened cocoa powder (80 g): This is the backbone of your chocolate flavor, so use a quality brand you enjoy.
- All purpose flour (80 g): Measured by weight is best here because too much flour makes them dry and tough.
- Fine sea salt (half tsp): Salt is the secret that makes chocolate taste like more chocolate.
- Semi sweet chocolate (115 g, chopped): For the ganache, choose a chocolate you would happily eat on its own.
- Heavy cream (120 ml): The fat content is essential for a silky ganache, so do not substitute with milk.
- Unsalted butter for ganache (15 g): This small addition gives the ganache a beautiful sheen and helps it set firmly.
- Rainbow candy coated chocolate chips (50 g): Mini chocolate candies or mini treats bring back that signature cosmic look.
Instructions
- Preheat and prepare your pan:
- Set your oven to 175 degrees Celsius (350 degrees Fahrenheit) and line an 8 by 8 inch square pan with parchment paper, leaving enough overhang on two sides to lift the brownies out later. Press the parchment into the corners so it sits as flat as possible.
- Build the sugar and butter base:
- Pour the melted butter into a large bowl and whisk in both sugars until the mixture looks glossy and no grainy spots remain. Take your time here because this smooth base is what makes the final texture so satisfying.
- Add eggs and vanilla:
- Crack in the eggs one at a time, whisking after each addition until everything is combined and the batter looks slightly lighter in color. Stir in the vanilla extract until it disappears into the mixture.
- Fold in the dry ingredients:
- Sift the cocoa powder, flour, and salt directly into the bowl, then use a spatula to gently fold everything together. Stop mixing the moment you no longer see dry streaks because overworking the batter makes brownies tough.
- Bake until just right:
- Scrape the batter into your prepared pan, smooth the top with your spatula, and bake for 23 to 25 minutes. You want the edges set but the center to still have the slightest wobble when you gently shake the pan.
- Cool completely:
- Leave the brownies in the pan on a wire rack and let them cool entirely to room temperature. Patience here is critical because warm brownies will melt your ganache into a messy puddle.
- Make the ganache:
- Place your chopped chocolate and the tablespoon of butter in a heatproof bowl. Heat the cream in a small saucepan just until you see steam rising and small bubbles forming at the edges, then pour it over the chocolate and let it sit undisturbed for two full minutes.
- Stir and spread:
- Starting from the center, stir the ganache in small circles until it transforms into a glossy, silky pool. Pour it over the cooled brownie base and use your spatula to spread it into an even layer that reaches every corner.
- Top with rainbow candies:
- Scatter the candy coated chocolates evenly across the ganache while it is still soft, pressing them in just lightly so they adhere. Work quickly before the ganache begins to set.
- Chill, slice, and serve:
- Refrigerate the pan for at least 30 minutes until the ganache is firm to the touch. Use the parchment overhang to lift the whole slab out, then cut into 12 bars with a sharp knife, wiping the blade clean between cuts for the neatest edges.
 Save to Pinterest
 The real magic happened when I realized these brownies had become a tradition without anyone deciding it. Every birthday, every celebration, there they were with their rainbow tops, and people would genuinely groan with disappointment if I showed up empty handed.
Serving Suggestions
These bars are sensational served chilled straight from the refrigerator when the ganache is firm and the brownie is dense and chewy. Let them sit at room temperature for about twenty minutes if you prefer a softer, more indulgent texture. A tall glass of cold milk or a shot of espresso alongside turns a simple dessert into a genuine experience.
Making Them Your Own
A pinch of espresso powder in the brownie batter amplifies the chocolate flavor without adding any coffee taste. You can swap the rainbow candy tops for chopped toasted hazelnuts, flaky sea salt, or even a drizzle of white chocolate for a different look entirely.
Storage and Make Ahead
These bars keep beautifully in an airtight container in the refrigerator for up to five days, and the flavor actually deepens overnight. You can also freeze them individually wrapped for up to three months, which is a dangerous thing to know when late night cravings strike.
- Always store them with parchment between layers so the ganache does not stick.
- Let frozen bars thaw in the refrigerator rather than on the counter for the best texture.
- Give yourself at least an hour total from bake to chilled slice before serving to guests.
 Save to Pinterest
 Some recipes are just recipes, but these brownies carry the kind of joy that makes people close their eyes when they take the first bite. Bake them once, and they will quietly become the thing everyone asks you to bring everywhere.
Recipe Questions & Answers
- → How can I tell when the bars are done baking?
-
Bake until the edges are set and the center still looks slightly underbaked—this yields a fudgy interior once cooled. A toothpick will show a few moist crumbs, not clean dry crumbs.
- → What is the best way to make a glossy ganache?
-
Heat cream until just steaming, pour over chopped chocolate, let sit 2 minutes, then stir gently until smooth. Adding a tablespoon of butter at the end boosts shine and spreadability.
- → Can I swap the candy topping for something else?
-
Yes. Try chopped toasted nuts, crushed cookies, or a sprinkle of sea salt for contrast. Add toppings while the ganache is still slightly warm so they adhere well.
- → How should I store the bars and for how long?
-
Keep chilled in an airtight container for up to 5 days. For room-temperature texture, remove 15–30 minutes before serving; refrigeration firms the ganache for cleaner slices.
- → Any tips for cutting clean bars?
-
Chill the slab until the ganache is fully set, then warm a sharp knife under hot water, dry it, and slice with smooth, confident strokes. Wipe the blade between cuts.
- → How can I make these gluten-free?
-
Substitute a 1:1 gluten-free flour blend and check that all other ingredients are certified gluten-free. Texture may vary slightly; avoid overmixing to keep fudginess.
