 Save to Pinterest
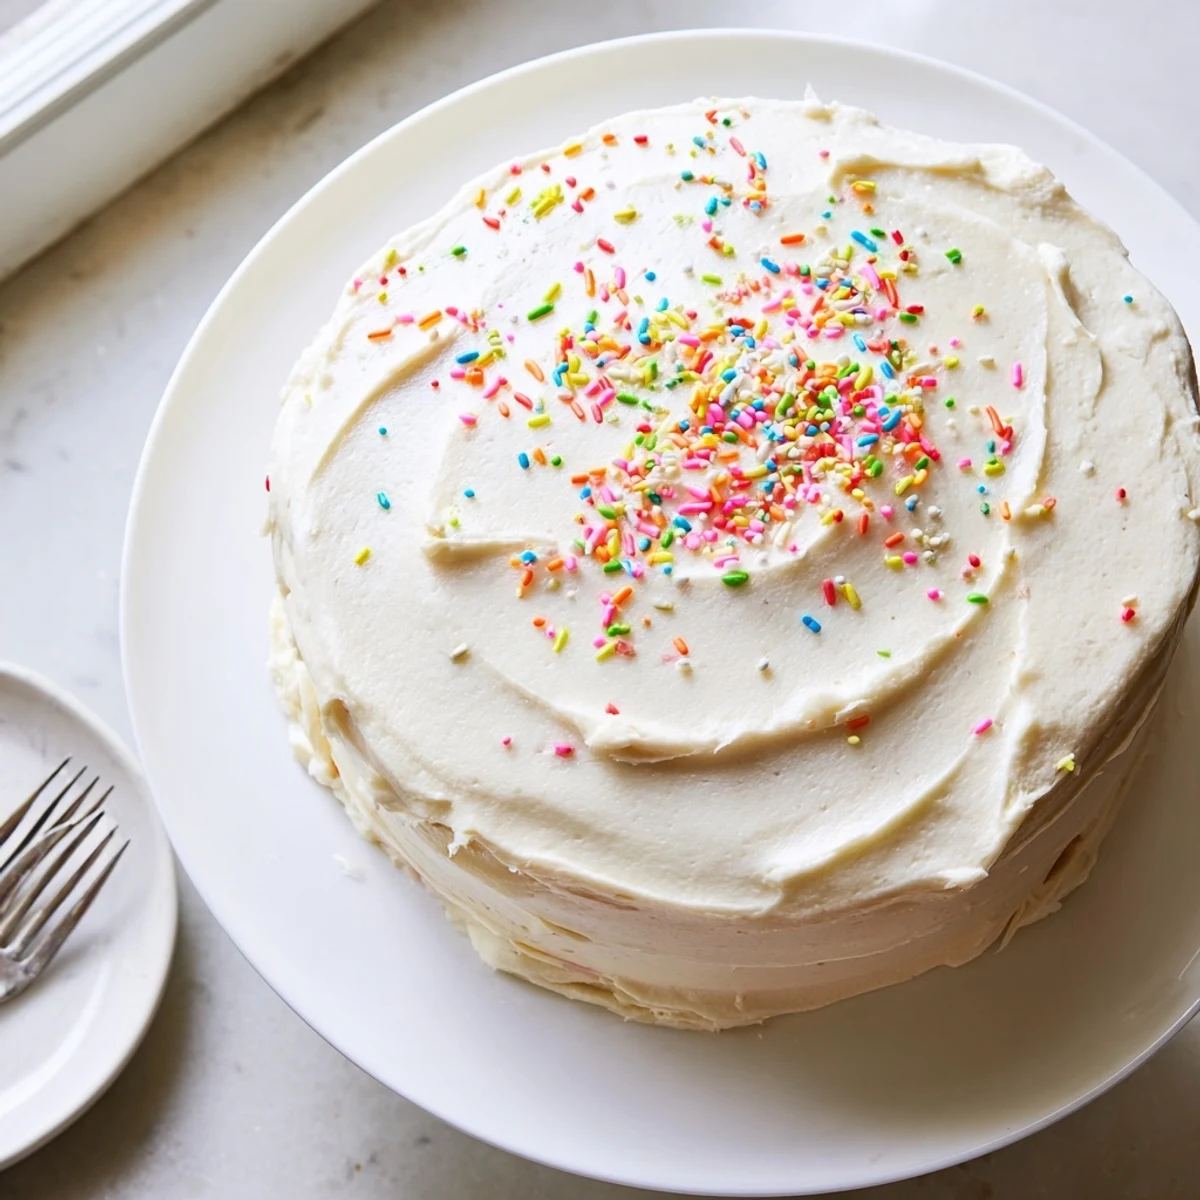
 This stunning vanilla bean cake delivers classic birthday celebration vibes with its tender, aromatic crumb and luxuriously creamy buttercream frosting. The secret lies in quality vanilla bean paste, which infuses every bite with intense floral sweetness.
You'll love how the light, fluffy texture balances the rich frosting, creating that perfect bakery-style experience at home. The straightforward method yields professional results every time.
Ready in just over an hour, this impressive dessert serves twelve generously. Whether decorated with simple sprinkles or elegant edible flowers, it's guaranteed to make any celebration memorable.
The first time I made a vanilla bean cake from scratch, I stood over the mixing bowl watching those tiny black specks scatter through the butter like edible stars. I had always relied on boxed cakes growing up, mostly because the baking aisle felt intimidating with all its precise measurements and chemistry terminology. My grandmother had hinted for years that real vanilla beans were worth the splurge, but I never understood until that afternoon in my tiny apartment kitchen. When the cake emerged golden and fragrant, I finally got what she meant about ingredients that earn their keep.
Last summer I made this cake for my nieces sixth birthday and she kept stopping by the kitchen table every five minutes to inspect the cooling layers. She asked if the black dots were ants and then when I explained they were vanilla she declared it the fanciest cake shed ever seen. Watching her eyes light up when I finally frosted it and added the sprinkles reminded me why homemade celebration cakes matter so much more than store bought ones.
Ingredients
- 2 ½ cups all-purpose flour: The foundation of the cake structure, measured carefully either by weight (315 g) or using the spoon and level method for accuracy.
- 2 ½ tsp baking powder: This is your lift agent, so check the expiration date before starting because old baking powder leads to sad dense cakes.
- ½ tsp fine salt: Salt might seem odd in a sweet cake but it actually intensifies the vanilla flavor and balances the sugar perfectly.
- 1 cup unsalted butter, softened: Use real butter here, nothing else, and let it come to room temperature naturally for the smoothest incorporation.
- 2 cups granulated sugar: Creaming this with the butter creates the airy tender texture that defines a great celebration cake.
- 4 large eggs, room temperature: Cold eggs can cause the butter to seize and curdle your batter, so let them sit out about 30 minutes before baking.
- 1 tbsp vanilla bean paste: Worth every penny, though you can scrape seeds from 2 whole vanilla beans if you prefer the ritual of working with whole pods.
- 1 cup whole milk, room temperature: This alternates with the dry ingredients to develop structure without overworking the gluten.
- 1 ½ cups unsalted butter for frosting: Again, room temperature is non negotiable for that luxurious silky buttercream texture.
- 5 cups powdered sugar, sifted: Sifting prevents lumps that would otherwise make your frosting grainy and unpleasant.
- 2 tbsp whole milk: Just enough to thin the frosting to spreadable consistency without making it too loose.
- 2 tsp vanilla extract: Pure extract complements the bean paste for layers of vanilla flavor throughout the frosting.
- Pinch of salt: A tiny pinch cuts through all that sugar and butter so the frosting does not taste cloyingly sweet.
Instructions
- Preheat and prepare your pans:
- Set your oven to 350°F (175°C) and generously grease two 9-inch round cake pans with butter, then line the bottoms with parchment paper circles for absolutely foolproof removal.
- Whisk the dry ingredients together:
- In a medium bowl, combine the flour, baking powder, and salt, whisking thoroughly to ensure the leavening is evenly distributed throughout.
- Cream butter and sugar until fluffy:
- Beat the softened butter and granulated sugar on medium speed for a full 3 to 4 minutes until the mixture looks pale and airy, creating tiny air bubbles that will expand during baking.
- Add eggs and vanilla:
- Drop in the eggs one at a time, beating for a full minute after each addition, then mix in the vanilla bean paste until those signature specks are evenly distributed.
- Combine wet and dry ingredients:
- Add the flour mixture in three portions, alternating with the milk in two portions, beginning and ending with the flour, mixing only until each addition disappears.
- Bake until perfectly done:
- Divide the batter evenly between your prepared pans, smooth the tops with an offset spatula, and bake for 30 to 35 minutes until a toothpick inserted in the center emerges clean.
- Cool the layers completely:
- Let the cakes rest in their pans for exactly 10 minutes before turning them out onto wire racks, and resist the urge to frost them until they are completely cool to the touch.
- Make the buttercream:
- Beat the softened butter on medium speed for 2 minutes until creamy, gradually add the sifted powdered sugar on low speed, then mix in the milk, vanilla, and salt before beating on high for 3 minutes until fluffy.
- Assemble and frost the cake:
- Place one cooled layer on your serving plate, spread a generous layer of buttercream over the top, set the second layer on top, then frost the top and sides with the remaining buttercream.
 Save to Pinterest
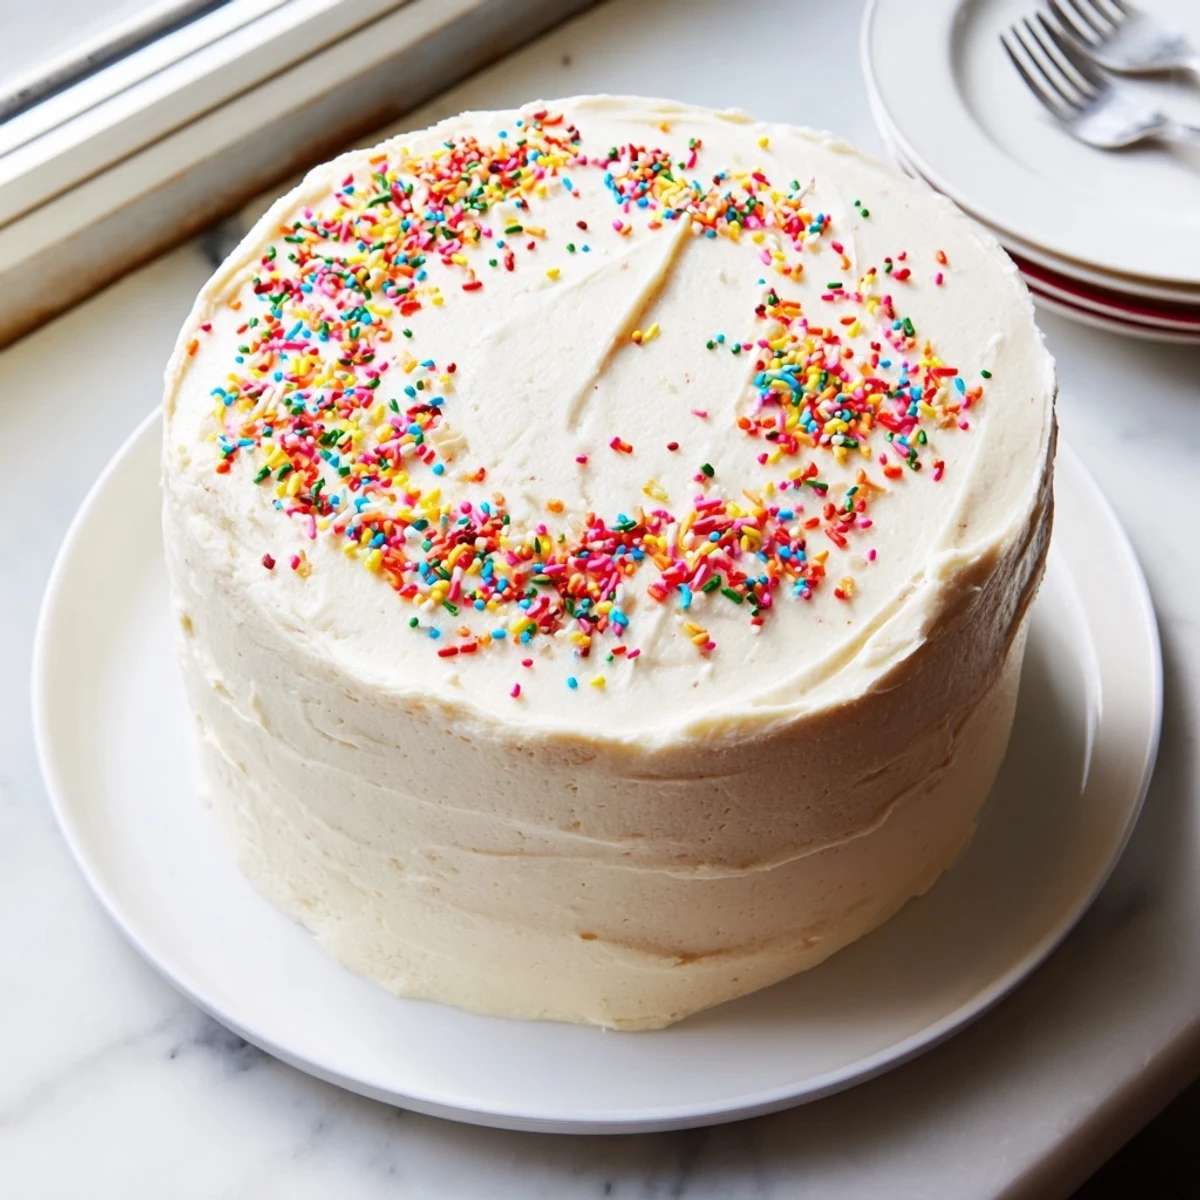
 My friend Sarah requested this cake for her wedding instead of a traditional tiered cake, saying it was the only dessert that actually tasted like happiness. Seeing it displayed on the head table surrounded by wildflowers made me realize sometimes the most nostalgic recipes become the most meaningful ones.
Making It Your Own
This vanilla base is incredibly forgiving and welcomes all sorts of variations depending on the occasion or season. I have added lemon zest to the batter for spring birthdays and folded fresh raspberries into the buttercream for summer dinner parties.
Perfecting The Frosting
If your buttercream feels too stiff, add another teaspoon of milk and beat for another minute. If it is too soft, refrigerate the bowl for 15 minutes before whipping again, which helps the butter firm up without changing the flavor.
Serving And Storing
This cake actually tastes better on day two as the flavors meld and the moisture distributes evenly throughout the crumb. Keep it covered at room temperature for up to three days, though in my house it rarely lasts beyond the first evening.
- Use a warm knife dipped in hot water for perfectly smooth frosting edges.
- Chill the frosted cake for 30 minutes before slicing to get cleaner cuts.
- Leftover buttercream freezes beautifully for up to three months in an airtight container.
 Save to Pinterest
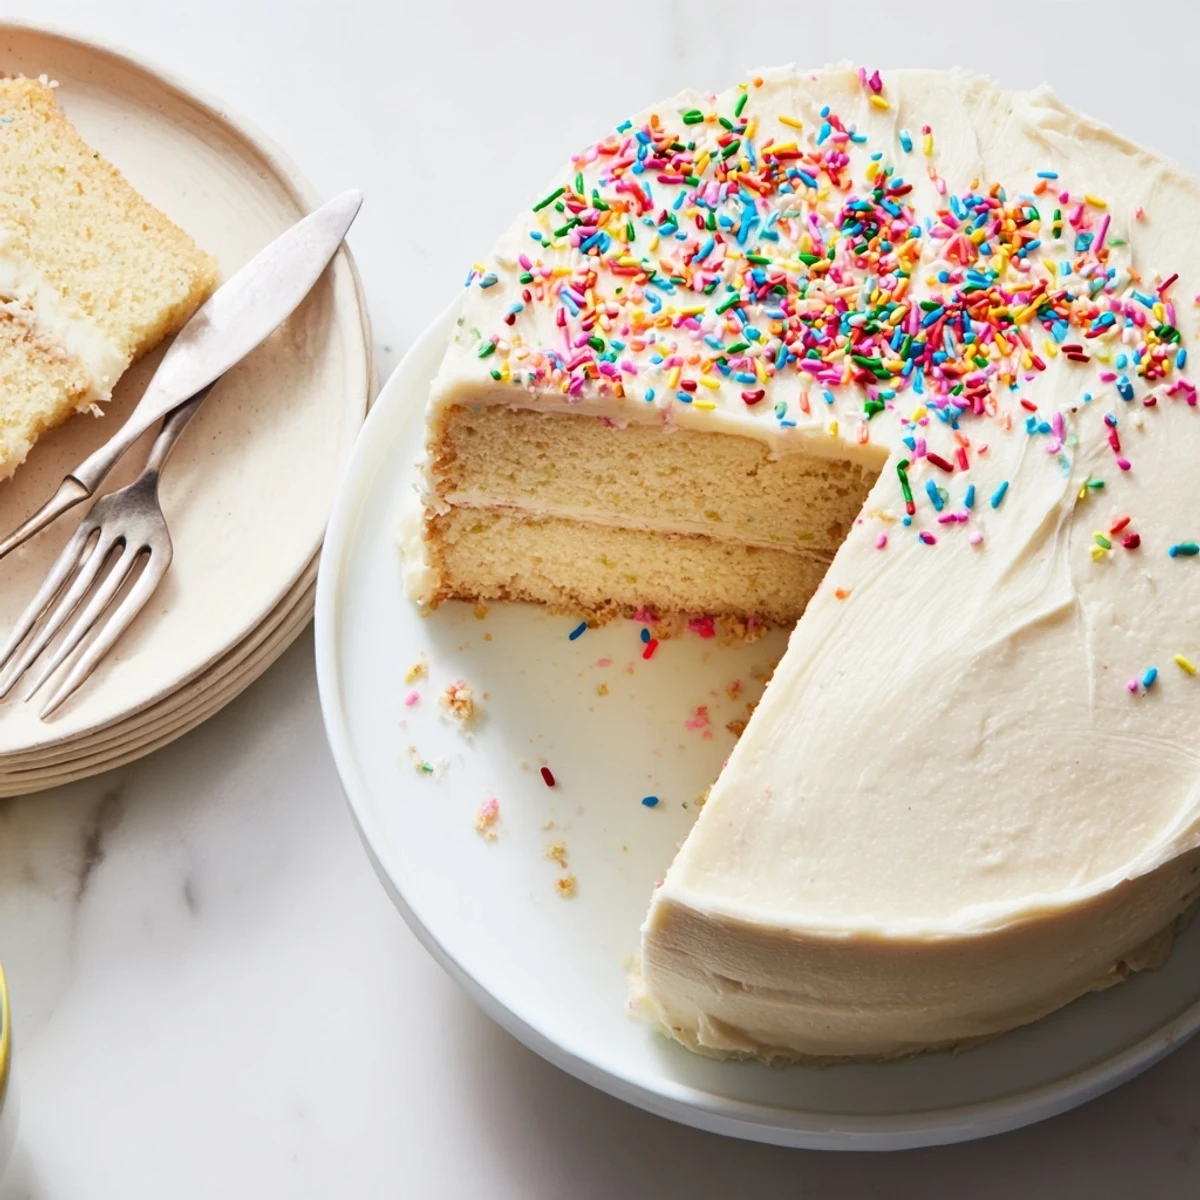
 There is something profoundly satisfying about slicing into a homemade layer cake, revealing the tender crumb you created from scratch. May this recipe find its way into your own birthday traditions and memory making moments.
Recipe Questions & Answers
- → Can I make vanilla bean cake ahead of time?
-
Yes, bake layers up to two days ahead. Wrap tightly in plastic and store at room temperature. Frost the day of serving for freshest results, or freeze unfrosted layers for up to three months.
- → What's the difference between vanilla bean paste and extract?
-
Vanilla bean paste contains actual vanilla seeds, delivering more intense flavor and beautiful specks throughout your cake. It offers the same potency as extract with added visual appeal and concentrated aroma.
- → How do I know when the cake is done baking?
-
Insert a toothpick into the center — it should come out clean or with just a few moist crumbs. The edges should pull slightly from the pan, and the top should spring back when gently touched.
- → Can I use salted butter instead of unsalted?
-
You can, but reduce added salt by half. Salted butter varies between brands, so controlling salt levels becomes trickier. For consistent results, stick with unsalted butter and measure salt precisely.
- → Why did my buttercream turn curdled?
-
This usually happens when ingredients are too cold. Let everything reach room temperature before mixing. If curdling occurs, keep beating — it often comes together. Or warm slightly over a water bath while whisking.
- → How should I store frosted cake leftovers?
-
Keep at room temperature for up to two days, covered loosely to prevent drying. For longer storage, refrigerate in an airtight container. Bring to room temperature before serving for optimal texture and flavor.
