 Save to Pinterest
 Brine chicken breasts in dill pickle juice with sugar and pepper to deepen flavor and tenderize. Butterfly, fill with cheese, ham and fresh herbs, then roll and secure. Triple-coat in flour, egg and seasoned panko for an ultra-crisp crust. Fry briefly to color, then finish in a hot oven, or bake with a butter drizzle for golden, juicy rolls. Rest and slice before serving.
The sizzle of chicken hitting a hot skillet is one of those sounds that instantly pulls everyone into the kitchen, and when that chicken has been soaking in pickle juice overnight, the curiosity factor doubles. My neighbor Dave leaned over my fence last summer asking what smelled so good, and two hours later we were splitting a plate of these golden rolls on my back porch. The tang from the brine works its way into every fiber of the meat, creating something that tastes like the best fried chicken and a deli sandwich had a delicious baby.
I burned the first batch because I got distracted telling my sister a story about my cat knocking a jar of pickles off the counter that morning, which felt like poetic justice.
Ingredients
- Pickle juice (1 cup): Use the juice straight from a jar of dill pickles, and the stronger and more garlicky the brine, the better the result.
- Sugar (1 tablespoon): A small amount of sugar balances the sharp acidity of the pickle juice so the brine tenderizes without turning the meat mushy.
- Black peppercorns (1 teaspoon): Whole peppercorns release their warmth slowly into the brine rather than overpowering it.
- Chicken breasts (4 boneless, skinless): Try to pick breasts that are roughly the same size so they cook evenly when rolled.
- Swiss or provolone cheese (4 slices): Provolone melts into a beautiful stretchy layer while Swiss adds a slightly nutty depth.
- Deli ham (4 slices, optional): Thinly sliced ham adds a salty, savory layer that complements the tangy chicken perfectly.
- Fresh dill or parsley (2 tablespoons, chopped): Fresh herbs bring brightness that cuts through the richness of the cheese and breading.
- All-purpose flour (1 cup): The flour base helps the egg wash adhere properly for a coating that actually stays on.
- Eggs (2 large, beaten): Room temperature eggs create a smoother wash that coats more evenly.
- Panko breadcrumbs (1 1/2 cups): Panko creates that irresistible shatteringly crisp exterior that regular breadcrumbs simply cannot match.
- Garlic powder (1 teaspoon): Garlic powder distributes flavor evenly throughout the coating without burning like fresh garlic would.
- Smoked paprika (1/2 teaspoon): A touch of smokiness makes these taste like they came off a grill even when baked in the oven.
- Vegetable oil or melted butter (1/4 cup): Butter gives a richer flavor for baking while oil is better for frying at higher temperatures.
Instructions
- Brine the chicken:
- Combine the pickle juice, sugar, and peppercorns in a large bowl or resealable bag, then submerge the chicken breasts and refrigerate for at least one hour or up to four hours for maximum flavor.
- Preheat and prep:
- If baking, preheat your oven to 400 degrees F and line a baking sheet with parchment paper so nothing sticks.
- Flatten the chicken:
- Remove the chicken from the brine, pat each piece dry with paper towels, butterfly each breast by slicing horizontally almost through the middle, then open it like a book and pound it between sheets of plastic wrap until it is an even quarter inch thick.
- Stuff and roll:
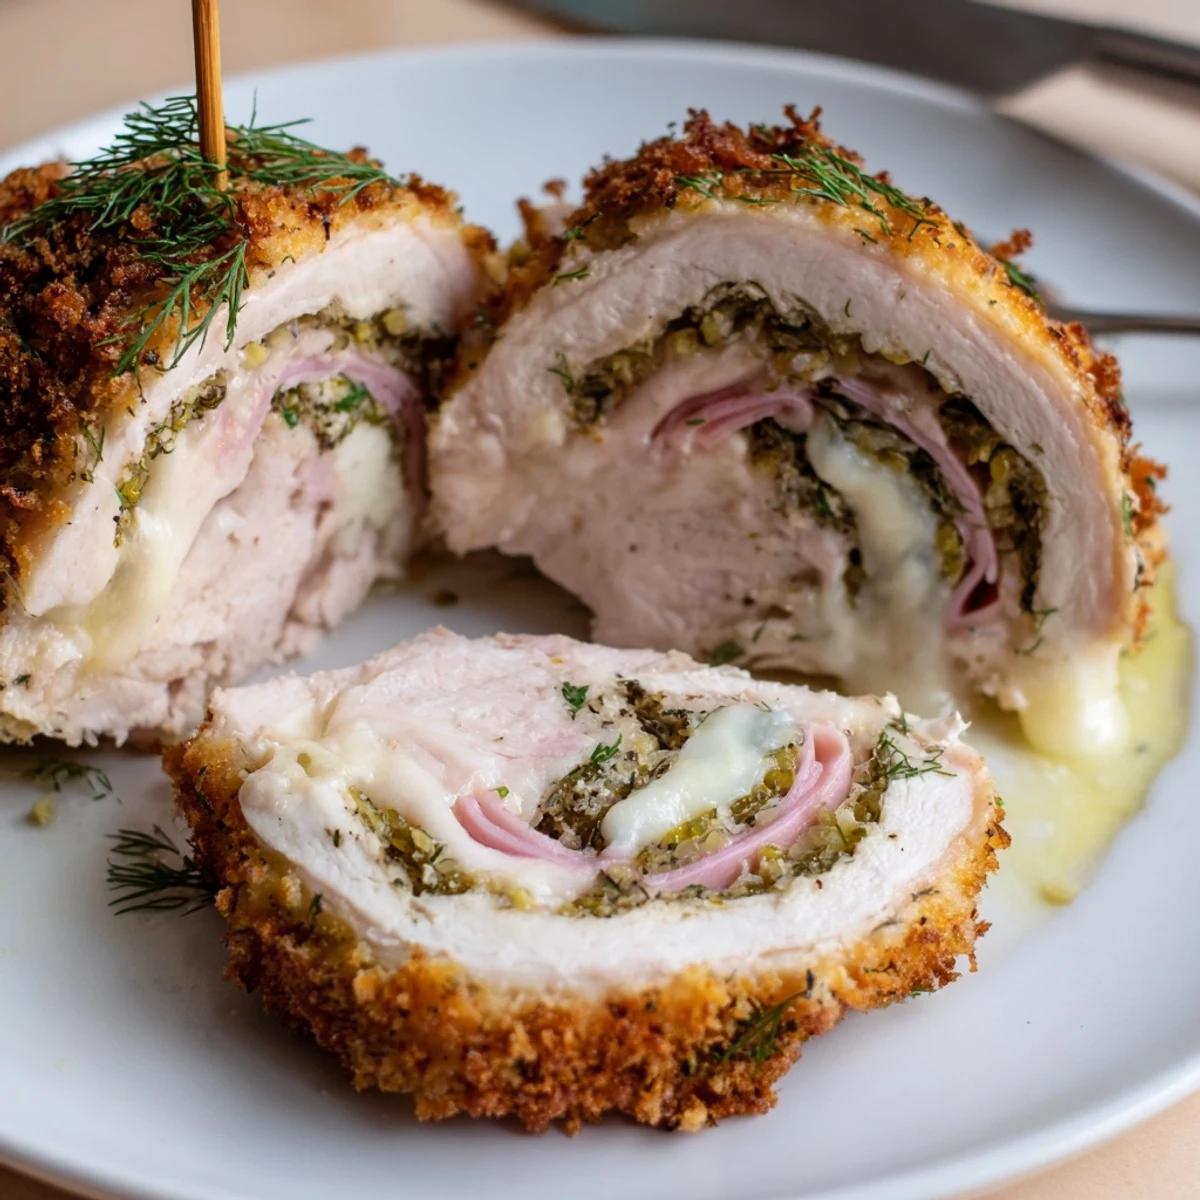
- Lay a slice of cheese, a slice of ham if using, and a generous sprinkle of fresh herbs on each flattened breast, season lightly with salt and pepper, then roll each one up tightly tucking in the sides and securing with toothpicks.
- Set up the breading station:
- Arrange three shallow bowls in a row with flour in the first, beaten eggs in the second, and panko mixed with garlic powder and smoked paprika in the third so you can work quickly and cleanly.
- Coat the rolls:
- Dredge each chicken roll through the flour first shaking off excess, dip it fully into the egg, then press it firmly into the seasoned panko until every surface is well coated.
- Cook until golden:
- For frying, heat oil in a skillet over medium heat and brown the rolls on all sides for about three to four minutes per side before transferring to a baking sheet to finish in the oven for fifteen minutes, or for baking only place the rolls on the prepared sheet, drizzle with melted butter or oil, and bake for twenty five to thirty minutes until deeply golden and cooked through.
- Rest and serve:
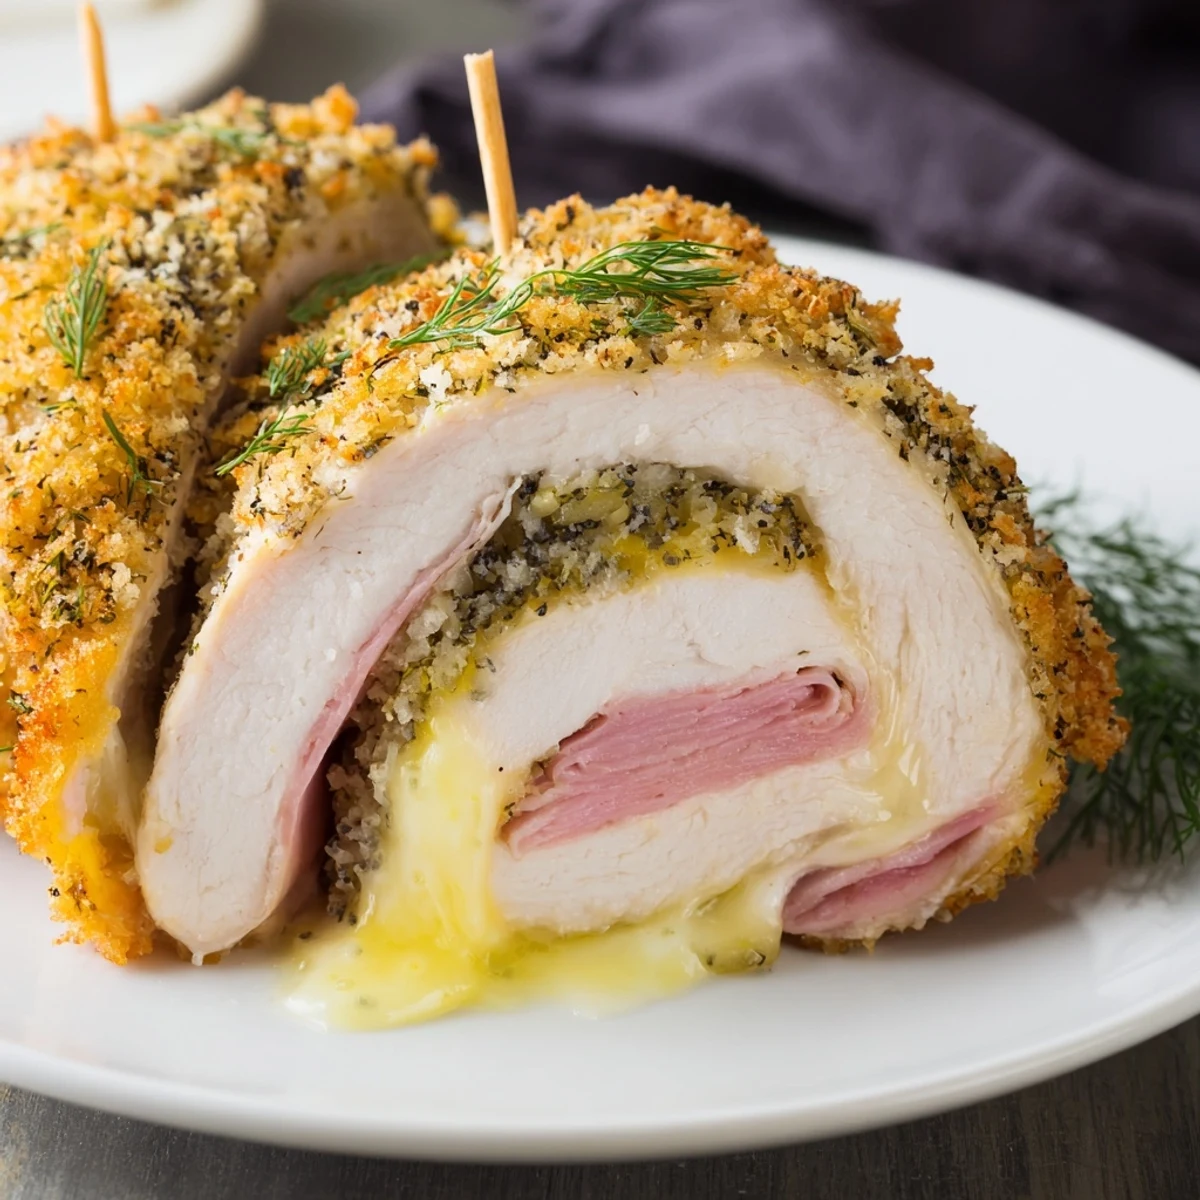
- Let the rolls rest for five minutes so the cheese settles and the juices redistribute, then slice into pinwheels and serve while hot.
 Save to Pinterest
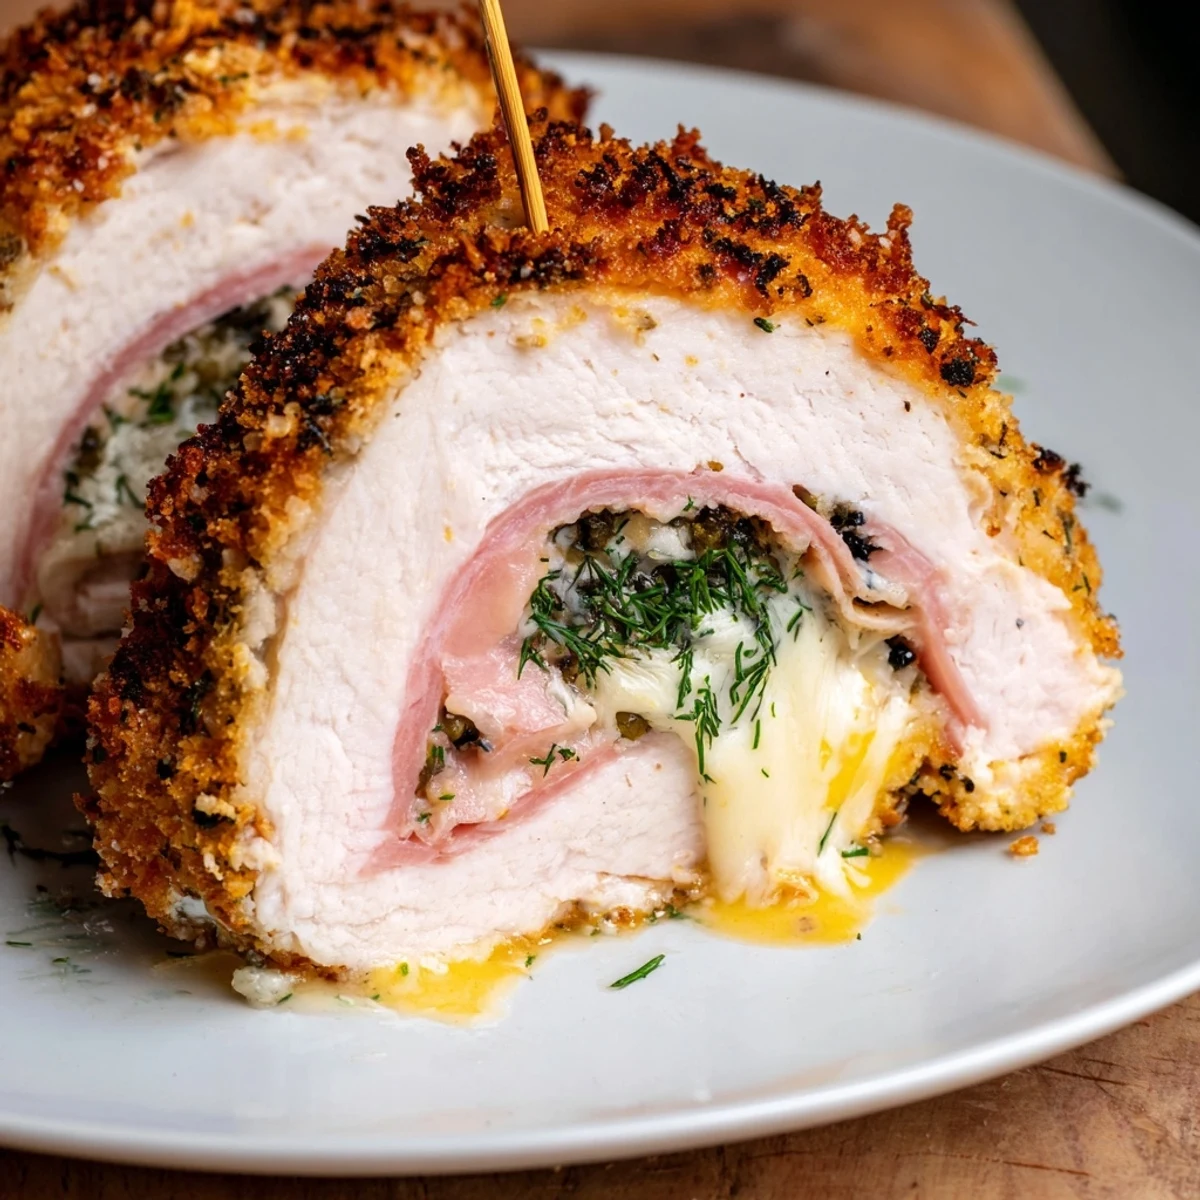
 The moment I sliced into my first successful roll and the cheese oozed out in a perfect spiral, I knew this dish was going into permanent rotation for every potluck and weeknight dinner I host.
Serving Ideas That Actually Work
These rolls are rich enough on their own that they beg for something crisp and acidic on the side. A simple coleslaw with a vinegar based dressing cuts through the richness beautifully, and a scoop of cold potato salad turns the whole plate into something that feels like a proper summer cookout.
Making It Your Own
Once you master the basic technique, start playing around with the fillings because the roll format is incredibly forgiving. Try pepper jack cheese and pickled jalapenos for a spicy version, or tuck in some roasted red peppers and mozzarella for an Italian twist.
Storing and Reheating
Leftover rolls keep well in the refrigerator for up to three days and reheat surprisingly well in an air fryer or oven at 375 degrees F for about ten minutes. The microwave works in a pinch but softens the coating, which is a shame when that crunch is the whole point.
- Freeze uncooked rolled and breaded chicken on a sheet pan, then transfer to a freezer bag for up to two months.
- Cook from frozen by adding about ten extra minutes to the baking time.
- Always check that the internal temperature reaches 165 degrees F before serving.
 Save to Pinterest
 There is something deeply satisfying about cutting into a golden crust and finding a swirl of melted cheese inside, and this recipe delivers that joy every single time.
Recipe Questions & Answers
- → How long should I brine the chicken?
-
Brine for at least 1 hour and up to 4 hours. Shorter brine gives a subtle tang; longer brine tenderizes more but avoid over-brining to prevent excessive saltiness.
- → Which pickles are best for the brine?
-
Dill pickle juice gives a classic bright tang. Spicy or garlic-packed pickles add extra kick — taste the juice first and adjust the sugar if the brine is very sharp.
- → Should I bake or fry the rolls?
-
Frying creates an immediate deep golden crust and can be finished in the oven for thorough cooking. Baking with a drizzle of melted butter or oil yields a lighter, still-crisp exterior with less hands-on frying.
- → How do I keep the rolls from unrolling?
-
Tuck the ends tightly and secure with toothpicks. Chilling the assembled rolls 10–15 minutes before breading helps them hold their shape during coating and cooking.
- → What fillings and cheeses work best?
-
Swiss or provolone melt nicely; prosciutto or ham add savory depth. Fresh dill or parsley brightens the filling. Avoid very runny cheeses that may leak during cooking.
- → Can I make this gluten-free?
-
Yes — substitute gluten-free flour and gluten-free panko or crushed crackers for the coating, and verify that any deli meats or additives are gluten-free.
